What Is Tub Recaulking and Why Does It Matter for Your Home
There is a thin line of material running along the edges of your bathtub that does a surprisingly important job. That line is caulk, and it is the barrier standing between your tub surround and the wall cavity behind it. Over time, caulk breaks down. It cracks, peels, discolors, and sometimes grows mold that no amount of scrubbing will fully address. Recaulking a tub means removing that old, degraded sealant and replacing it with fresh material to restore the waterproof seal. It sounds straightforward, and in many ways it is, but there is a lot more happening underneath the surface than most homeowners realize. Getting this task right protects your tile, your subfloor, your walls, and ultimately your home’s structural integrity. Getting it wrong can quietly lead to water damage that costs far more than the tube of caulk you skipped replacing.
How Tub Caulk Works and What It Is Actually Doing
Caulk is a flexible sealant, typically silicone or latex-based, applied to the joints where your bathtub meets the surrounding tile, wall panel, or surround. These joints are not static. Your tub shifts slightly every time it fills with water and bears the weight of a person. Walls expand and contract with temperature and humidity changes. A rigid material in that joint would crack almost immediately. Caulk flexes with those movements, which is what makes it the right material for the job. The waterproof seal it creates prevents moisture from infiltrating the gap between the tub and the wall, which would otherwise seep into the subfloor, studs, and drywall behind the tile. That kind of hidden moisture is a slow disaster. It breeds mold, weakens structural wood, and can eventually compromise tile adhesion, causing entire sections of a wall surround to loosen or collapse.
Signs Your Tub Caulk Needs to Be Replaced
Most homeowners do not think about their caulk until something goes visibly wrong. But by the time problems are obvious, there is often damage already done. Knowing what to look for helps you get ahead of it. Watch for these indicators that your tub caulk has reached the end of its useful life:
- Visible cracks, gaps, or separations along the caulk line
- Caulk pulling away from the tub or wall surface
- Persistent discoloration or black spotting that does not respond to cleaning
- Soft, spongy texture instead of a firm, smooth bead
- A musty odor near the tub area even after cleaning
- Tile that sounds hollow when tapped near the caulk joint
Any one of these signs should prompt action. Several of them together means the project has likely already moved past prevention and into damage control.
The Recaulking Process Step by Step
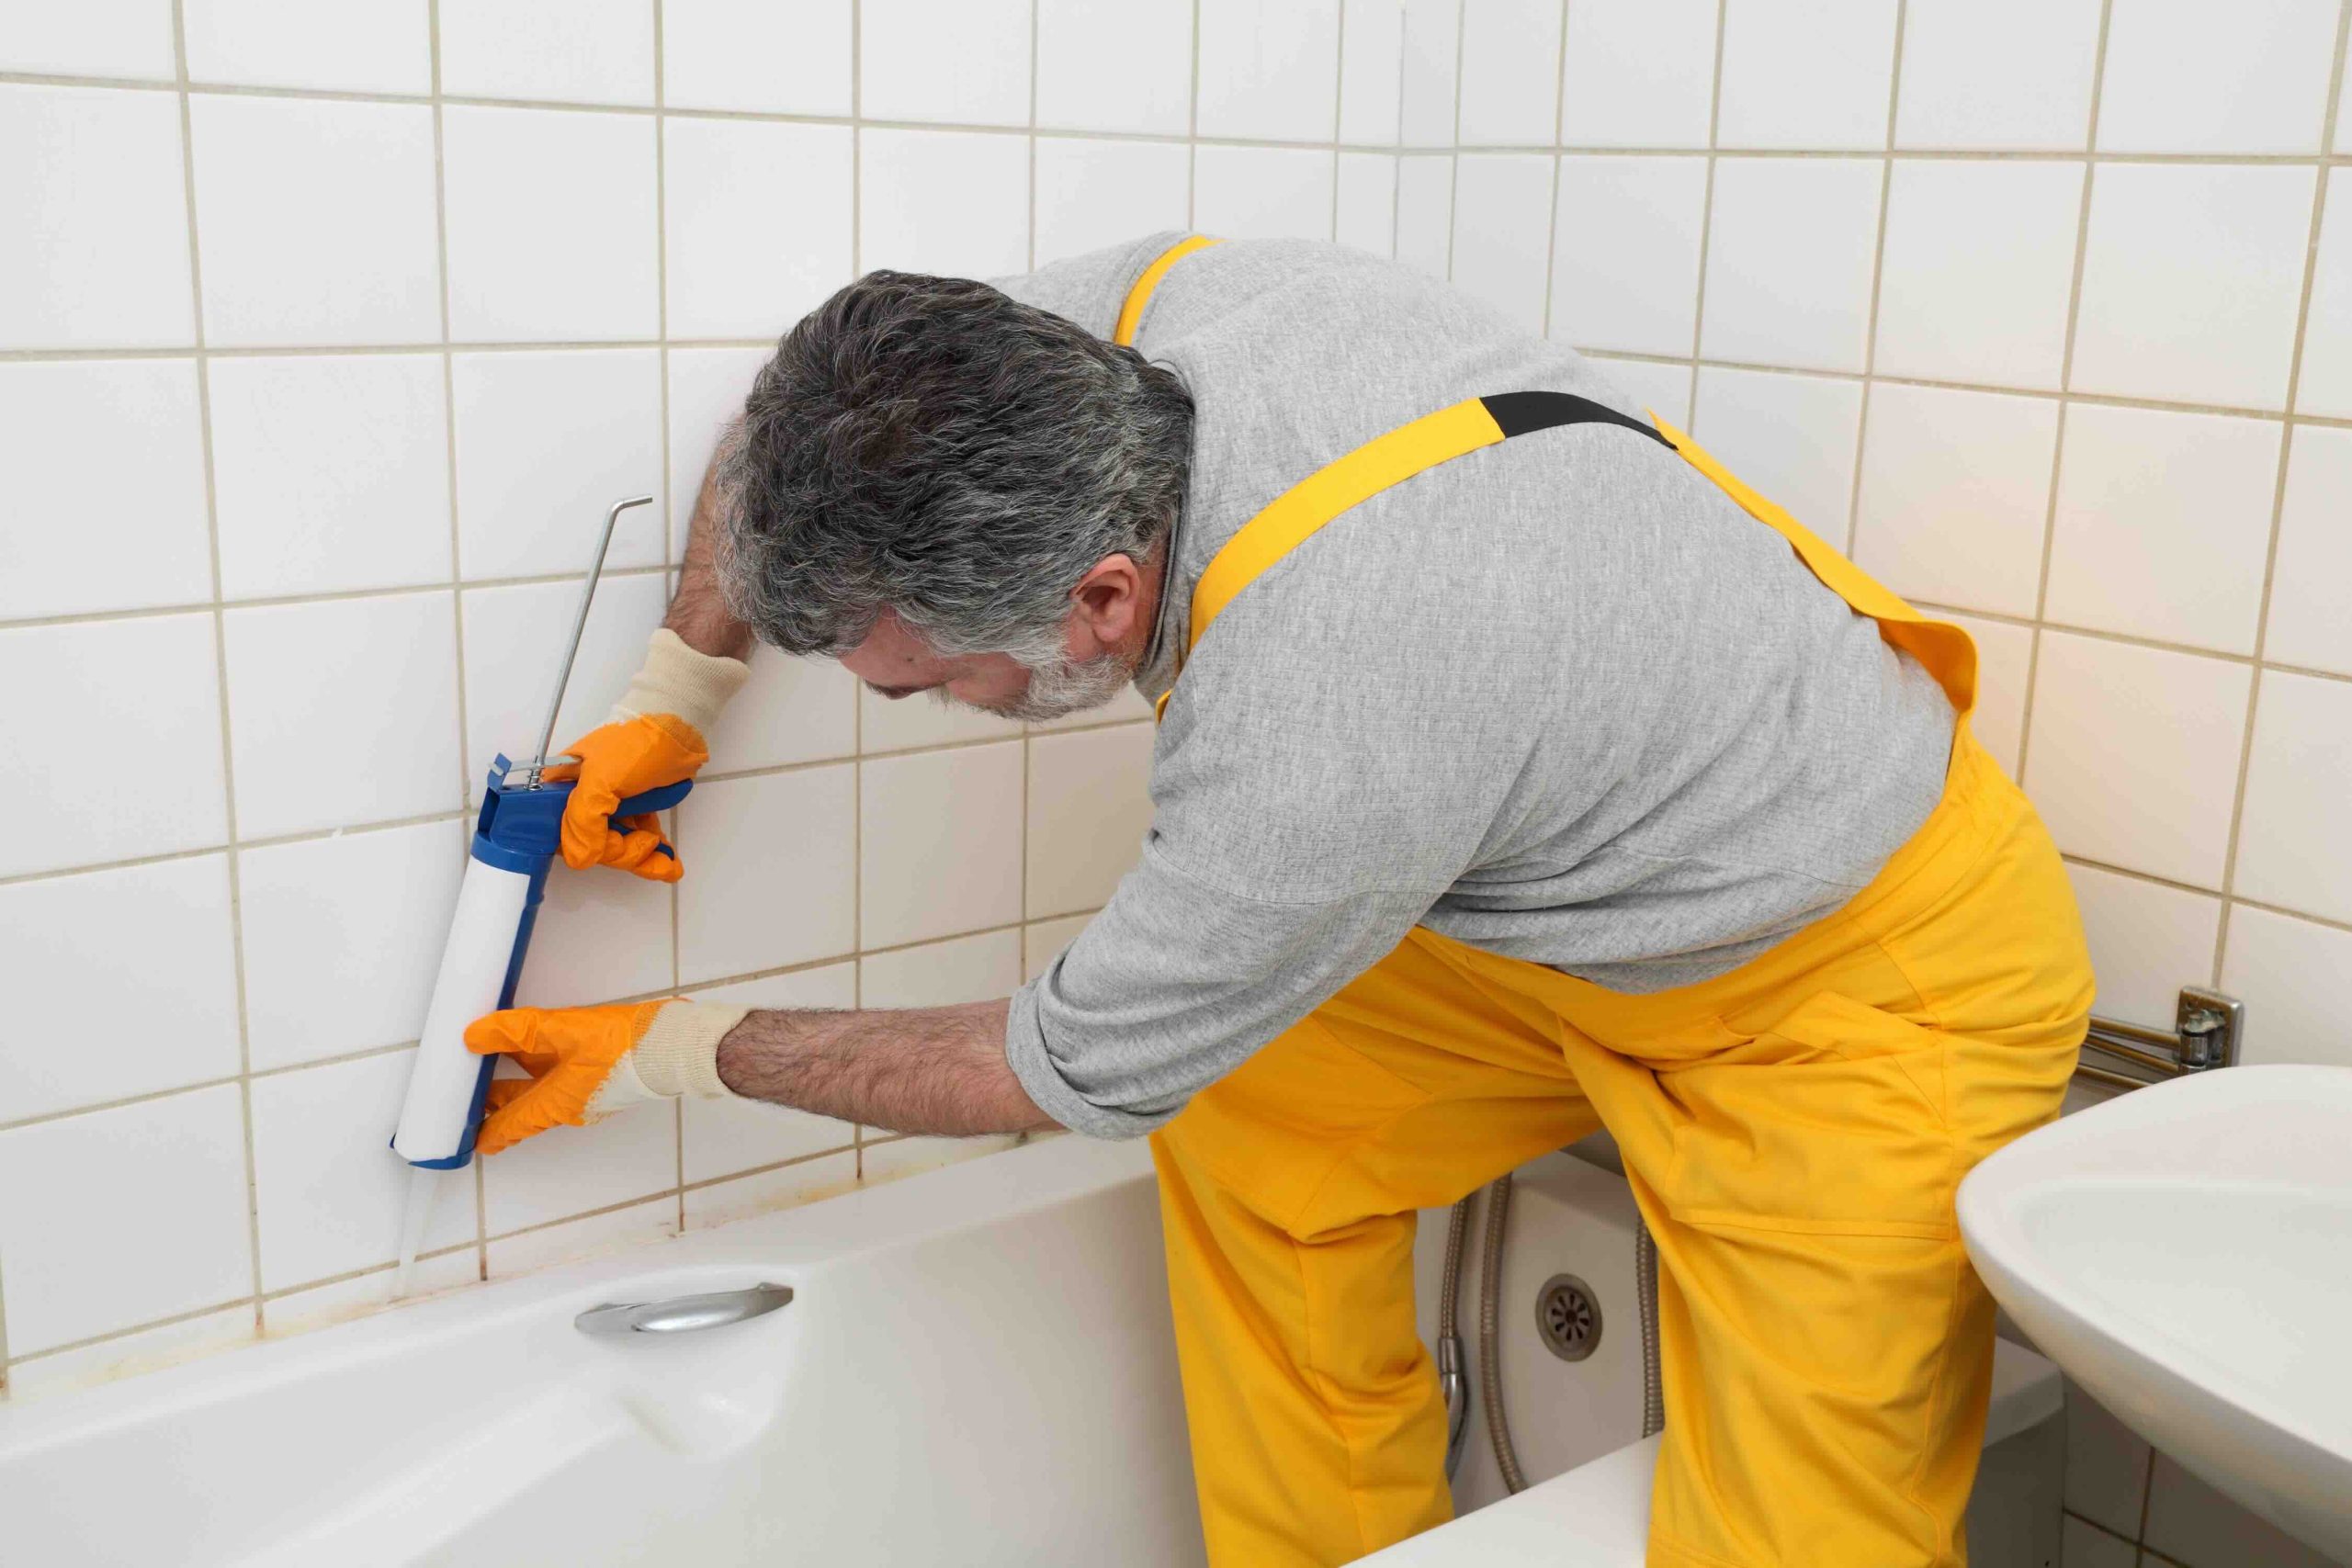
Recaulking a tub is a DIY-friendly project for most homeowners, but it does require patience and proper technique. Rushing any step tends to result in a caulk job that fails prematurely. The process begins with full removal of the old caulk. This is done using a utility knife, a caulk removal tool, or both, followed by a thorough cleaning of the joint with isopropyl alcohol or a dedicated caulk remover solvent. Any trace of old caulk, soap residue, or mold will prevent the new material from bonding properly. Once the surface is completely clean and dry, and this part matters a great deal, the new caulk can be applied. A steady, even bead is run along the joint, then smoothed with a wet finger or a caulk finishing tool. Most products require 24 to 48 hours of cure time before the tub should be used again. Skipping the cure time is one of the most common mistakes homeowners make, and it dramatically shortens the life of the new sealant.

Silicone vs. Latex Caulk: Choosing the Right Product
The product you choose makes a real difference in how long your caulk job lasts. Silicone caulk is the gold standard for tub applications. It is highly flexible, completely waterproof, and mold-resistant, making it well-suited for the wet, humid environment of a bathroom. The trade-off is that it is harder to apply smoothly, more difficult to paint over, and requires careful surface preparation to adhere well. Latex or acrylic-latex caulk is easier to work with and cleans up with water, but it does not hold up quite as well in consistently wet conditions. Many manufacturers offer products labeled specifically for kitchen and bath use, which include mildewcide additives to extend the life of the seal in high-humidity environments. For a tub that sees daily use, 100 percent silicone or a high-quality siliconized latex blend is the better investment.
Key Advantages of Recaulking Your Tub
This is a home maintenance task with a genuinely impressive return on investment. A tube of caulk costs a few dollars. Professional recaulking, if you prefer to hire it out, typically runs between $75 and $300 depending on your area and the scope of the job. Either way, the cost is minimal compared to what water intrusion repair can involve. Beyond the financial argument, fresh caulk meaningfully improves the appearance of your bathroom. Old, stained caulk makes even a clean bathroom look worn down. A clean, white bead along the tub surround has a surprisingly dramatic visual effect. There is also the indoor air quality consideration. Mold growth in caulk joints is not just a cosmetic issue. It contributes to airborne mold spores in your bathroom, which is an air quality and health concern, particularly for households with allergy or asthma sensitivities.
Common Mistakes That Lead to Premature Caulk Failure
Even experienced DIYers sometimes end up with caulk that peels within a few months. The most frequent culprits are inadequate surface preparation, applying caulk over existing caulk without full removal, and using the wrong product type for the application. Another common issue is filling the tub with water before caulking. This sounds counterintuitive, but your tub actually sits lower under load. If you caulk with an empty tub, the joint may stretch and crack once the tub fills again. Filling the tub before application allows the joint to expand to its loaded position, so the caulk bonds at the correct width. One more frequently overlooked factor is humidity. Applying caulk in a steamy bathroom or immediately after the shower has been running can compromise adhesion. The surface should be dry, and the room should be at a moderate temperature for the best results.
When to Call a Professional for Tub Recaulking
Most tub recaulking projects are well within DIY territory, but there are situations where professional involvement is the smarter call. If you remove old caulk and find soft, discolored drywall or wood, that is a sign of existing water damage that needs to be assessed and remediated before new caulk is applied. Sealing over damaged material traps moisture and accelerates the problem. Similarly, if tile is cracked, loose, or showing signs of movement, the underlying substrate may need attention before a surface-level caulk repair will hold. A licensed tile contractor or general contractor can evaluate the extent of the damage and recommend the right repair path. In these cases, recaulking is still part of the solution, but it is not the whole solution.
How Home Warranty Coverage Relates to Bathroom Maintenance
Recaulking a tub sits in the category of routine home maintenance, and it is worth understanding how that distinction plays out when you have a home warranty. Home warranties are designed to cover mechanical failures of systems and appliances, not general wear and maintenance tasks. That means caulk replacement is typically a homeowner responsibility. However, the consequences of neglected caulk can cross into warranty territory. Water damage that results from deteriorated caulk and compromises a covered plumbing system or structural component may create complications during a claim. Keeping up with bathroom maintenance, including regular caulk inspection and replacement, is a straightforward way to protect both your home and the integrity of any warranty coverage you carry. Documented maintenance habits also put you in a stronger position if questions arise during a claim review.
Why Armadillo Belongs in Your Home Protection Plan
Taking care of a home is an ongoing project, and recaulking your tub is just one item on a long list of things that need regular attention. That is exactly why having a reliable home warranty in your corner matters. Armadillo home warranty plans for bathroom plumbing and home systems protection are built around the real needs of homeowners who want straightforward coverage without the frustrating fine print. When the unexpected happens, whether it is a plumbing system failure, an appliance breakdown, or a covered mechanical issue that a simple caulk job cannot solve, Armadillo is designed to respond quickly and clearly. If you have been putting off getting covered because the process feels complicated, it genuinely does not have to be. You can get a free home warranty quote to protect your bathroom plumbing and major home systems in just a few minutes. Staying ahead of maintenance and having coverage for what you cannot predict is the most practical combination a homeowner can have.

Frequently Asked Questions About Recaulking a Tub
Answers to the most common questions homeowners have about tub caulk, recaulking, and related home maintenance considerations.
How often should I recaulk my bathtub?
Most tub caulk should be inspected annually and replaced every three to five years under normal use. Tubs that see heavy daily use may need recaulking more frequently, particularly if the caulk shows early signs of cracking or discoloration.
Can I caulk over existing caulk instead of removing it?
This is not recommended. Applying new caulk over old caulk almost always results in poor adhesion and premature failure. The old material must be fully removed and the surface cleaned before new caulk is applied for a lasting result.
What is the best caulk to use for a bathtub?
100 percent silicone caulk or a high-quality siliconized latex formula specifically labeled for kitchen and bath use is the best choice for tub applications. These products offer superior flexibility, waterproofing, and mold resistance compared to standard interior caulk.
How long does tub caulk take to dry before I can use the shower?
Most tub caulks require 24 to 48 hours of cure time before the area should be exposed to water. Some fast-cure products claim shorter timelines, but waiting the full recommended period ensures the sealant has bonded properly and will last longer.
Is recaulking a tub something I can do myself?
Yes, for most homeowners recaulking a tub is a manageable DIY project. It requires basic tools, the right caulk product, and careful surface preparation. If you find water damage or structural issues during the process, that is when professional help is warranted.
How do I remove old caulk from a bathtub without damaging the surface?
Use a utility knife or dedicated caulk removal tool to score and lift the old material, then clean the residue with isopropyl alcohol or a caulk remover solvent. Work carefully near tile and tub surfaces to avoid scratching, and avoid using sharp metal tools aggressively on acrylic or fiberglass tubs.
What causes black mold to grow in tub caulk?
Black mold growth in caulk is caused by persistent moisture trapped in or beneath the sealant combined with inadequate ventilation. Once mold penetrates below the surface of the caulk, cleaning alone will not resolve it. Full caulk removal and replacement is the appropriate fix.
Does a home warranty cover water damage caused by bad caulk?
Home warranties generally do not cover damage resulting from deferred maintenance, and caulk deterioration falls into that category. However, if neglected caulk leads to failure of a covered plumbing system or component, it may complicate a related claim. Staying current on maintenance protects both your home and your coverage.
How do I know if water has gotten behind my tub tiles?
Hollow-sounding tile when tapped, loose or shifting grout, visible staining on adjacent walls, a musty odor, or soft spots in the wall near the tub surround are all indicators that water has infiltrated behind the tile. These conditions require investigation before simply recaulking the joint.
Should I fill the tub with water before applying new caulk?
Yes. Filling the tub before caulking allows it to settle into its loaded position, which is how it will sit during actual use. Caulking an empty tub can result in a joint that stretches and cracks once the tub fills with water and weight, causing premature failure of the new sealant.