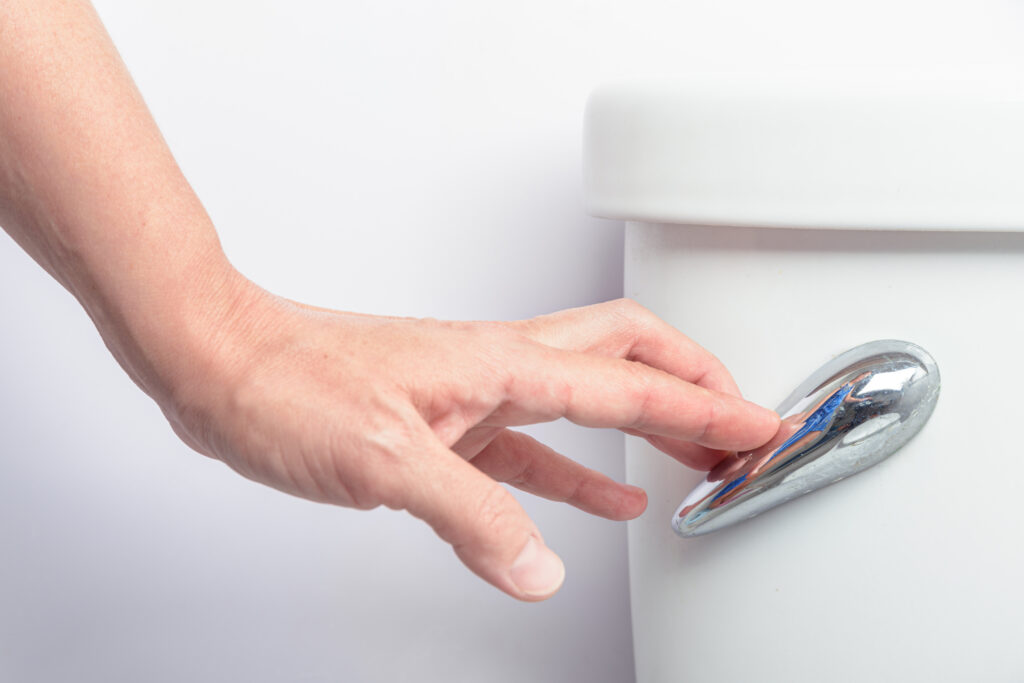

What Is a Toilet Handle and Why Does It Matter More Than You Think
Most homeowners never give a toilet handle a second thought until it stops working. That little lever attached to the side of your tank is actually doing more than you might realize. It initiates the entire flush cycle, connects to the flapper chain inside the tank, and controls how water moves from the tank into the bowl. When it works, great. When it does not, you are dealing with a toilet that either will not flush, runs constantly, or requires an awkward jiggle to get anything done. Installing or replacing a toilet handle is one of those deceptively simple home repairs that can save water, reduce frustration, and actually extend the life of the surrounding components if done correctly.
How a Toilet Handle Works From the Inside Out
Understanding the mechanism behind the toilet handle makes the repair process significantly less intimidating. When you press or lift the handle on the outside of the tank, a metal or plastic arm on the inside lifts a chain, which is attached to the flapper at the bottom of the tank. The flapper lifts, water rushes into the bowl, and the flush cycle begins. Once the tank empties, the flapper drops back into place and the fill valve refills the tank. The handle itself is secured through a hole in the tank wall and held in place by a mounting nut on the inside. That mounting nut is threaded in reverse, so it loosens clockwise and tightens counterclockwise, which is something that trips up a lot of people during installation.
Signs It Is Time to Replace Your Toilet Handle
Not every toilet handle problem is obvious at first. Some signs are subtle, and homeowners often dismiss them as minor quirks. Knowing what to look for can help you catch a failing handle before it turns into a bigger plumbing issue.
- The handle feels loose, wobbly, or disconnected when pressed
- You have to hold the handle down to complete a full flush
- The toilet runs continuously after flushing
- The handle is visibly corroded, cracked, or discolored
- The chain keeps slipping off the handle arm inside the tank
- The toilet requires multiple flushes to clear waste
Any one of these symptoms usually points back to the handle assembly. The good news is that replacement handles are inexpensive and widely available at hardware stores, and the installation process typically takes under thirty minutes.
How to Install a Toilet Handle Step by Step
Before anything else, turn off the water supply to the toilet using the shutoff valve located near the base of the toilet behind the bowl. Flush the toilet once to drain as much water from the tank as possible. Remove the tank lid and set it somewhere safe. Now locate the mounting nut on the inside of the tank that secures the handle. Using an adjustable wrench or pliers, turn the nut clockwise to loosen it, since again, it is reverse-threaded. Once the nut is removed, slide the old handle out through the hole in the tank wall. Disconnect the chain from the handle arm if it is still attached. Insert the new handle through the same hole, making sure the arm on the inside of the tank points toward the flapper. Thread the mounting nut onto the handle shaft and tighten counterclockwise until snug. Reconnect the chain to the handle arm, leaving about half an inch of slack so the flapper can open and close freely. Turn the water supply back on, let the tank refill, and test the flush. Adjust the chain length if needed until the flush cycle feels right.
Choosing the Right Replacement Handle for Your Toilet
Toilet handles are not entirely universal, so it helps to know what to look for before buying one. Most standard handles fit toilets with front-mount or side-mount configurations, and the packaging usually identifies which style it accommodates. Measure the distance between the handle hole and the flapper to get a sense of the arm length you need. Handles come in a variety of finishes including chrome, brushed nickel, oil-rubbed bronze, and matte black, so you can match it to your bathroom hardware if aesthetics matter to you. Metal handles tend to outlast plastic ones, though both are affordable. If your toilet is a specific brand like Kohler, American Standard, or Toto, look for a branded replacement or a universal handle confirmed compatible with that manufacturer.

Key Advantages of Replacing a Toilet Handle Promptly
Replacing a worn or broken toilet handle is a small investment with a surprisingly meaningful return. A properly functioning handle ensures the flapper seals completely after each flush, which prevents the toilet from running continuously and wasting water. According to the EPA, a running toilet can waste up to 200 gallons of water per day. That adds up fast on a water bill. Beyond the water savings, a new handle restores reliable performance to one of the most frequently used fixtures in any home. It also removes strain from the flapper and fill valve, since both components work harder when a faulty handle causes incomplete flushes or constant cycling. Essentially, a five-dollar handle replacement can protect twenty-dollar components and prevent hundred-dollar water bills.
Common Mistakes Homeowners Make During Installation
Even a straightforward repair like this has a few pitfalls worth knowing about. The reverse-threaded nut is probably the most common source of confusion, and forcing it the wrong direction can crack the tank. Over-tightening the mounting nut is another frequent mistake since it can damage the porcelain or the handle itself. Setting the chain length incorrectly is also a typical issue where too little slack causes the flapper to stay partially open and the toilet runs constantly, while too much slack prevents the flapper from lifting fully and causes weak flushes. Finally, some homeowners skip the step of turning off the water supply, which leads to unnecessary mess and makes the job harder than it needs to be.
When a Toilet Handle Replacement Is Not Enough
Occasionally the handle is not the root problem. If you replace the handle and still experience a running toilet, weak flushes, or incomplete cycles, the flapper or fill valve may need attention. Flappers are rubber and deteriorate over time, losing their ability to create a proper seal. Fill valves can wear out too, causing improper tank water levels that affect flush performance. In some situations, sediment buildup in the tank or a cracked internal component may be contributing to the issue. If basic troubleshooting and part replacement do not resolve the problem, a licensed plumber can diagnose deeper issues within the toilet system. It is worth noting that internal toilet components are sometimes covered under a home warranty plan depending on how the policy defines plumbing system coverage.
Does a Home Warranty Cover Toilet Handle Repairs
This is a question homeowners ask more often than you might expect. Home warranty coverage for toilets typically focuses on the mechanical and internal working components rather than cosmetic or exterior parts. Some plans cover things like the fill valve, flapper, and flush mechanism, while others specifically exclude handles as they are considered minor hardware items. The exact language of your home warranty contract determines what qualifies. That said, when a toilet malfunction goes beyond a simple handle swap and involves the internal plumbing components or becomes part of a larger pipe or drain issue, a comprehensive home warranty plan can significantly offset repair or replacement costs. Always review your coverage documents carefully and contact your provider with specific questions about what your toilet protection includes.
Why Armadillo Is the Smart Choice for Homeowners Who Want Real Protection
A toilet handle is a manageable DIY fix, but not every home repair is that simple. When your plumbing system, appliances, or major home systems decide to fail at the worst possible time, having the right protection in place makes all the difference. That is where Armadillo comes in. As a trusted home warranty provider for homeowners who want straightforward plumbing and systems coverage, Armadillo is built around making home protection feel less overwhelming and more accessible. There are no confusing tiers of fine print designed to leave you guessing when something breaks. If you want to protect your plumbing system and major home components before the next unexpected repair bill shows up, you can get a free home warranty quote for toilet and plumbing system protection in just a few minutes. Armadillo is the kind of coverage that makes sense for real homeowners dealing with real problems.

Frequently Asked Questions About Installing a Toilet Handle
How long does it take to install a toilet handle?
Most toilet handle replacements take between fifteen and thirty minutes for someone with basic DIY skills. The process involves turning off the water supply, removing the old handle, installing the new one, and adjusting the chain length before testing the flush.
Do I need any special tools to replace a toilet handle?
No specialized tools are required. An adjustable wrench or pair of pliers is typically all you need to loosen and tighten the mounting nut inside the tank. Some installations can even be completed by hand.
Why is the toilet handle mounting nut reverse-threaded?
The reverse threading is intentional. It prevents the nut from loosening over time due to the rotational movement caused by repeated handle use. Turning it clockwise loosens it, and counterclockwise tightens it.
Can a faulty toilet handle cause a running toilet?
Yes. A worn or incorrectly installed handle can prevent the flapper from sealing properly after a flush, which causes water to continuously trickle from the tank into the bowl. This results in a toilet that runs without stopping.
Are toilet handles universal or brand-specific?
Many toilet handles are designed to be universal and fit most standard toilets, but some brands and models require specific replacement parts. Checking your toilet’s manufacturer and model number before purchasing a replacement handle is always a good idea.
How much does a replacement toilet handle cost?
Replacement toilet handles are generally inexpensive, ranging from about five to thirty dollars depending on the material, finish, and brand. Metal handles in premium finishes tend to cost more than basic plastic options.
Is a toilet handle covered under a home warranty?
Coverage varies by provider and plan. Some home warranties cover internal toilet components like flappers and fill valves, while others treat the handle as a minor hardware item excluded from coverage. Reviewing your specific policy terms will clarify what is included.
What should I do if my new toilet handle still does not flush properly?
First, check the chain length inside the tank. Too much slack prevents a complete flush, and too little slack keeps the flapper from sealing. If adjusting the chain does not resolve the issue, the flapper or fill valve may also need to be inspected or replaced.
Can I replace a toilet handle without turning off the water supply?
Technically possible, but not recommended. Turning off the water supply and flushing the tank first reduces the risk of accidental overflow and makes the installation process much cleaner and easier to manage.
How often should a toilet handle be replaced?
There is no fixed replacement schedule, but most toilet handles last many years under normal use. Replacing the handle whenever you notice persistent looseness, difficulty flushing, or visible corrosion is a practical approach to maintaining reliable toilet performance.