
Why Cleaning Baseboards Before Painting Actually Matters More Than You Think
Here is the thing about baseboards — most people walk past them every single day without giving them a second glance. But the moment you decide to repaint them, suddenly every scuff mark, dust layer, and grease smear becomes impossible to ignore. Cleaning baseboards before painting is not just a nice-to-have step in the process. It is the difference between a finish that lasts and one that starts peeling before the paint even has a chance to cure. And if you own your home and care about maintaining its value, that distinction matters quite a bit.
What Exactly Are Baseboards and Why Do They Get So Dirty
Baseboards are the trim pieces that run along the bottom of your interior walls where they meet the floor. They are primarily decorative, but they also protect the drywall from everyday wear, furniture damage, and moisture. Because of their location — right at floor level — they collect everything. Dust bunnies, pet hair, cooking grease that settles over time, scuff marks from shoes, and even residue from floor cleaning products all find a home on baseboards. That combination of debris creates a surface that paint simply cannot bond to properly. When painters skip the cleaning step, the result is often a finish that chips, bubbles, or fails to adhere in certain spots. That is a frustrating outcome after putting in real effort.
The Supplies You Will Need Before You Start
Getting organized before you begin makes the whole process faster and more effective. You do not need a lot of fancy equipment here, just the right combination of basic cleaning tools.
- Microfiber cloths or clean rags
- A bucket of warm water
- Mild dish soap or TSP (trisodium phosphate) substitute
- A soft-bristle brush or old toothbrush for corners
- Dry Magic Eraser or fine-grit sanding sponge
- Painter’s tape
- A vacuum with a brush attachment
TSP substitute is particularly useful for baseboards with heavy grease or stubborn buildup. It is a degreasing cleaner that prepares surfaces for paint without the hazardous handling concerns of traditional TSP. You can find it at most hardware stores, and it is worth keeping on hand for future painting projects around the house as well.
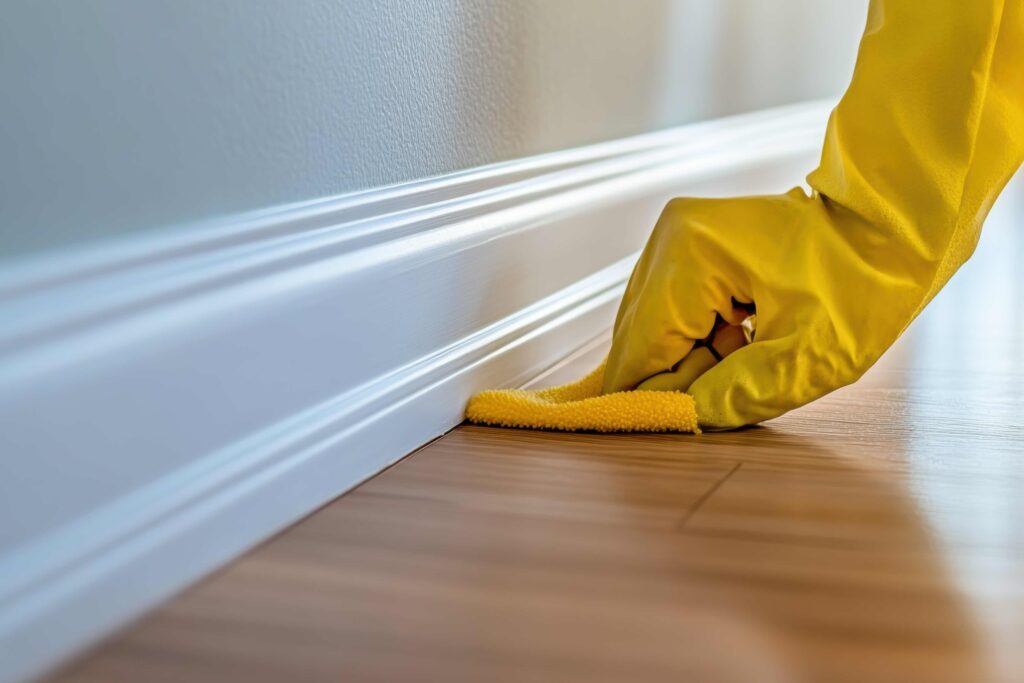
Step-by-Step: How to Clean Baseboards Before Painting
Start by vacuuming the baseboards using a brush attachment. This removes the loose dust and debris that would otherwise turn into muddy streaks once you introduce any moisture. Work from one end of the room to the other so you are not re-depositing dust onto areas you have already cleared. After vacuuming, mix a small amount of dish soap into warm water and dip your cloth into the solution, wringing it out well so it is damp but not soaking wet. Wipe down the entire length of each baseboard using consistent pressure. For corners and crevices, switch to a soft-bristle brush or an old toothbrush to dislodge anything tucked into tight spots. Once the surface looks clean, go over it again with a cloth dampened only with clean water to remove any soap residue. This matters because soap residue can interfere with primer and paint adhesion just as much as dirt can. Let the baseboards dry fully — usually one to two hours — before moving on.
Dealing With Stubborn Stains and Scuff Marks
Some baseboards need a little extra attention, especially in high-traffic areas like hallways, kitchens, and mudrooms. If you are dealing with scuff marks that a damp cloth is not touching, try a dry Magic Eraser with light pressure. It works well on painted surfaces and does not require rinsing. For greasy or sticky buildup, particularly common in kitchens, the TSP substitute solution is your best bet. Mix according to package directions, apply with a sponge or cloth, let it sit for a minute or two, then wipe clean with a damp rag. After addressing the tough spots, lightly sand the entire surface with a fine-grit sanding sponge — this is called scuff sanding — to create a slightly rough texture that helps new paint grip the surface better. Wipe away the sanding dust with a tack cloth or slightly damp microfiber cloth before priming.

Key Advantages of Cleaning Baseboards Thoroughly Before Painting
Taking the time to clean properly before you paint pays off in ways that are easy to see and some that are not so obvious at first. A clean surface allows primer and paint to adhere the way they are designed to, which directly extends the life of your finish. You also end up using less paint overall because the product goes on smoothly and evenly rather than getting absorbed unevenly into a dirty surface. There is a professional quality to a freshly painted, clean baseboard that makes the entire room feel more polished and finished. And from a home value standpoint, well-maintained trim is one of those subtle details that prospective buyers and home inspectors notice more than most people expect.
Common Mistakes Homeowners Make When Prepping Baseboards
Skipping the vacuuming step before wiping is one of the most common errors. Applying a wet cloth to a dusty baseboard just spreads the debris around and can push it into the paint profile of the trim. Another frequent mistake is using too much water, which can cause swelling or damage to wood baseboards or MDF trim. Rushing the drying time is also a problem — painting over a surface that is even slightly damp leads to adhesion failures. Finally, many homeowners skip priming altogether after cleaning, especially when doing a color change. Primer is not optional when you are painting baseboards that have been heavily cleaned or scuff sanded. It seals the surface and ensures the topcoat performs the way it should.
When Baseboard Painting Signals a Bigger Home Maintenance Issue
Sometimes cleaning and repainting your baseboards reveals problems you were not expecting. Soft spots in the baseboard material, warping, or dark discoloration could indicate moisture intrusion from a plumbing leak or humidity issue behind the walls. Peeling paint near the floor level might point to a slab moisture problem or a failing vapor barrier. These are not cosmetic issues — they are symptoms of underlying home system failures that need attention before any surface work gets done. This is exactly the kind of unexpected discovery that reminds homeowners how interconnected a house really is. A minor painting project can quickly uncover something that requires professional repair.
Practical Tips for Maintaining Baseboards Long After the Paint Dries
Once your baseboards are freshly painted and looking great, a little routine maintenance goes a long way toward keeping them that way. Dust them regularly with a microfiber cloth or the brush attachment on your vacuum — once every couple of weeks is usually enough. Avoid using harsh floor cleaners near the baseboards, as chemical splatter is a slow but real cause of paint degradation. If you notice a scuff or small chip, touch it up promptly rather than waiting until it spreads or the finish starts to peel more broadly. Keeping the area around baseboards dry and well-ventilated also reduces the risk of moisture-related issues developing over time.
How Armadillo Helps Protect the Systems Behind Your Walls While You Focus on the Finish
Repainting your baseboards is satisfying work, and doing it right — starting with a thorough clean — shows real care for your home. But as any experienced homeowner knows, the finish work is only one layer of what makes a house function well. The plumbing, HVAC, electrical systems, and appliances behind those freshly painted walls are doing the heavy lifting every single day. When something in one of those systems breaks down unexpectedly, it can derail your home improvement plans and your budget in a hurry. That is where home warranty coverage for essential systems and appliances becomes genuinely valuable — not as a luxury, but as a practical financial safeguard for real homeowners. Armadillo offers straightforward, transparent protection that covers the failures you cannot always see coming. If you are ready to stop worrying about what is lurking behind the walls, take two minutes to get a free home warranty quote for your house today and see exactly what coverage looks like for your specific home.

Frequently Asked Questions About Cleaning Baseboards Before Painting
Real questions from real homeowners, answered directly so you can move forward with confidence.
Do I really need to clean baseboards before painting them?
Yes, cleaning is essential. Dust, grease, and residue prevent paint from adhering properly, which leads to chipping, bubbling, and uneven coverage. A clean surface is the foundation of any lasting paint job.
What is the best cleaner to use on baseboards before painting?
For light dirt, warm water with mild dish soap works well. For heavier grease or buildup, a TSP substitute solution is more effective. Always rinse with clean water afterward and let the surface dry completely before painting.
Can I paint baseboards without sanding them?
If the existing finish is in good condition and you are applying a similar sheen, light scuff sanding is still recommended to improve adhesion. If the surface is rough, flaking, or you are switching paint types, sanding is necessary.
How long should I wait for baseboards to dry after cleaning before painting?
Allow at least one to two hours of drying time in a well-ventilated room. In humid conditions, wait longer. Painting over even slightly damp trim will cause adhesion problems and an uneven finish.
Should I use primer after cleaning baseboards before painting?
Yes, especially if you are changing colors, covering a stained or raw wood surface, or painting over heavily cleaned trim. Primer seals the surface and gives the topcoat something solid to grip.
What causes baseboards to look dirty or yellow over time?
Dust accumulation, cooking grease, cigarette smoke, UV exposure, and general household grime all contribute to yellowing and discoloration over time. Semi-gloss or gloss paint sheens are easier to wipe clean and resist staining better than flat finishes.
Can soft or damaged baseboards indicate a plumbing problem?
Yes. Soft spots, swelling, or dark staining on baseboards near the floor can indicate moisture intrusion from a plumbing leak or slab issue. If you notice these signs, investigate the source before proceeding with any painting or cosmetic repairs.
What sheen of paint is best for baseboards?
Semi-gloss is the most common and practical choice for baseboards. It is durable, easy to wipe clean, and holds up well in high-traffic areas. High-gloss offers even more durability but shows surface imperfections more readily.
How often should baseboards be repainted?
Most baseboards benefit from a fresh coat every three to five years, depending on traffic and wear. High-traffic areas like hallways and kitchens may need attention more frequently, while bedrooms and low-traffic spaces can often go longer between repaints.
Does a home warranty cover damage to baseboards or trim?
Home warranties typically cover mechanical systems and appliances rather than cosmetic trim or finishes. However, if baseboard damage is caused by a covered plumbing leak or system failure, the underlying repair may be covered, reducing the overall cost to restore the affected area.