How to Install Backsplash Tile in Your Kitchen: A Homeowner’s Complete Guide
Installing a kitchen backsplash is one of those projects that sits somewhere between genuinely satisfying and genuinely humbling. It transforms a flat, forgettable wall into something that actually looks intentional — and it protects surfaces behind your sink and stove from moisture, grease, and daily wear. Whether you are upgrading a dated kitchen or finishing a full renovation, understanding how to install backsplash tile in a kitchen puts a real skill in your hands. This guide walks through the process clearly, from surface prep to grouting, and also touches on where a home warranty fits into the bigger picture of kitchen maintenance.
What Is a Kitchen Backsplash and Why Does It Matter
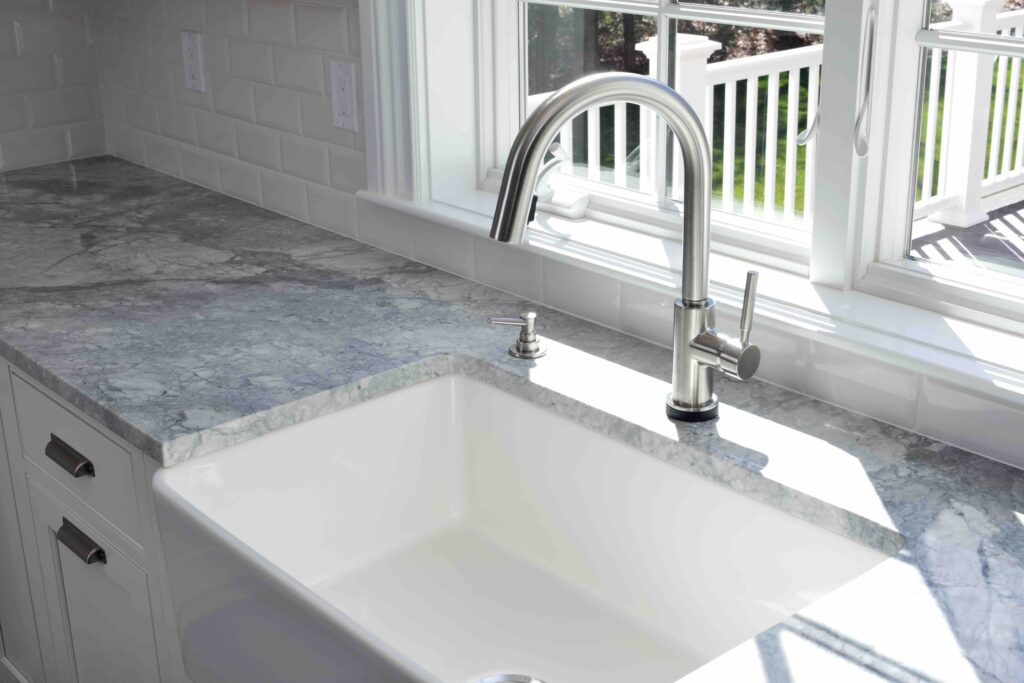
A kitchen backsplash is a wall covering installed between your countertops and upper cabinets, typically spanning the area behind the sink, stove, and prep surfaces. It exists primarily as a protective barrier — sealing the wall against water damage, food splatter, and steam — but it has become one of the most visually impactful design elements in modern kitchens. Materials range from ceramic and porcelain tile to glass, natural stone, and even metal. Each brings different maintenance requirements, costs, and aesthetics. Tile remains the most popular option because it balances durability, water resistance, and design flexibility in a way few other materials can match.
Tools and Materials You Will Need Before You Start
Preparation is not optional here. Showing up to a tiling project without the right tools creates frustration fast. Before you pull a single tile off the shelf, gather everything on this list.
- Tile of your choice, plus roughly ten percent extra for cuts and breakage
- Tile adhesive or mastic suitable for kitchen and wet-area use
- Notched trowel for spreading adhesive evenly
- Tile cutter or wet saw for precise cuts around outlets and edges
- Tile spacers to maintain consistent grout lines
- Grout, grout float, and a bucket for mixing
- Sponges, clean cloths, and a spray bottle with water
- Level, pencil, and measuring tape
- Painter’s tape and drop cloths for surface protection
Preparing the Wall Surface for Tile Installation
Wall prep is where most DIY backsplash projects either succeed or fail before a single tile goes up. The surface needs to be clean, dry, flat, and free of any grease or residue. In a kitchen, that last part matters more than most people expect — cooking grease embeds itself into painted drywall surfaces over time and will prevent adhesive from bonding properly. Wipe the wall thoroughly with a degreasing cleaner and let it dry completely. If the existing paint is glossy, scuff it lightly with sandpaper to improve adhesion. Check for any high spots or dips using a level and fill or sand as needed. A flat wall means consistent tile contact, which means fewer tiles that pop loose six months later.

How to Lay Out and Plan Your Tile Pattern
Layout planning before applying any adhesive saves you from awkward half-tiles at the most visible spots. Start by finding the center point of your backsplash area — typically the center of the wall or directly above the stove — and mark a vertical reference line with a level and pencil. This becomes your anchor point. Dry-lay tiles along the counter with spacers to visualize how the pattern works across the full width. If you end up with a sliver of tile at either edge, shift your layout slightly so the cuts are more balanced. Symmetry matters visually, even if the wall itself is not perfectly symmetrical. Taking twenty minutes to do this step properly is worth far more than the time you save by skipping it.
Applying Tile Adhesive and Setting the Tile
Use a notched trowel to spread tile mastic or adhesive onto the wall in small, manageable sections — roughly two to three square feet at a time. Larger sections dry out before you finish placing tiles, which defeats the purpose. Hold the trowel at a consistent angle to create even ridges in the adhesive. Press each tile firmly into place with a slight twisting motion to collapse those ridges and create full contact. Use spacers between every tile to maintain uniform grout lines. Work outward from your center reference line, checking frequently with a level to make sure rows stay straight. When you reach outlets or switches, cut tiles carefully using a wet saw and turn off the circuit breaker before working near any electrical box.
Grouting Your Kitchen Backsplash the Right Way
Once the adhesive has cured — typically twenty-four hours, though check the product instructions — remove the tile spacers and mix your grout to a peanut butter consistency. Use a rubber grout float held at a forty-five degree angle to push grout diagonally across the tile joints, working it fully into each gap. Do not grout in direct sunlight or in a room that is excessively warm, as grout dries too fast under those conditions and becomes difficult to work with. After the grout has set slightly — usually fifteen to twenty minutes — use a damp sponge in circular motions to remove excess from the tile faces. Rinse the sponge frequently. A haze will remain on the tiles after drying; buff it off with a clean dry cloth.
Sealing, Caulking, and Finishing Touches
Grouted tile is not automatically waterproof. Porous grout absorbs moisture and stains over time unless sealed. Apply a penetrating grout sealer after the grout has fully cured — typically seventy-two hours — and wipe away any excess. At the joint where the backsplash meets the countertop, skip the grout entirely and use a flexible silicone caulk instead. This joint is subject to movement as the counter and wall expand and contract slightly with temperature changes, and rigid grout will crack there eventually. Match the caulk color to your grout for a seamless look. Reattach any outlet covers or switch plates, restore power to the circuit, and step back — the kitchen just got significantly better.
Common Mistakes to Avoid When Installing Kitchen Backsplash Tile
Even experienced DIYers make these errors, and knowing them ahead of time keeps your project cleaner and more durable.
- Skipping wall prep and applying tile over greasy or poorly painted surfaces
- Using wall grout instead of sanded floor grout for wider joints
- Failing to account for electrical box depth when setting tile thickness
- Rushing the adhesive cure time before grouting
- Using grout instead of caulk at countertop and cabinet junctions
- Not sealing natural stone tile before grouting, which causes permanent staining
How a Home Warranty Protects Your Kitchen Beyond the Backsplash
A new backsplash adds real value to your kitchen — but the appliances and systems behind those beautiful tiles are what keep everything functioning. Your dishwasher, garbage disposal, built-in microwave, and plumbing lines all live within the same space you just upgraded, and they all carry the risk of unexpected failure. That is where Armadillo home warranty coverage for kitchen appliances and systems becomes a smart part of your overall homeownership strategy. A home warranty picks up where your homeowners insurance leaves off — covering mechanical breakdowns due to normal wear and tear, not just sudden accidents or disasters. If you just invested time and money into a kitchen renovation, it makes sense to protect the equipment inside that kitchen too. Get a free home warranty quote to protect your kitchen appliances and plumbing and see how affordable that coverage can actually be. Armadillo keeps things simple, transparent, and genuinely useful — no fine print designed to confuse you, just real protection for the systems that matter most.

Frequently Asked Questions About Installing Kitchen Backsplash Tile
Here are the most common questions homeowners ask when tackling a kitchen backsplash project for the first time.
How long does it take to install a kitchen backsplash?
Most standard kitchen backsplash installations take one to two days when you account for wall prep, tile setting, adhesive cure time, and grouting. Larger kitchens or complex tile patterns may require an additional day.
Do I need to remove existing tile before installing new backsplash tile?
Ideally yes. Installing over existing tile adds thickness, which can create problems at outlet depths and along cabinet edges. If the existing tile is firmly bonded and flat, thin-set can sometimes be applied over it, but removal gives you the cleanest result.
What type of tile is best for a kitchen backsplash?
Ceramic and porcelain are the most practical choices — they are durable, moisture-resistant, easy to clean, and available in a wide range of styles. Glass tile offers a high-end look but is more challenging to cut. Natural stone requires sealing and more maintenance.
Can I install a backsplash tile myself without professional help?
Yes, a standard subway tile or mosaic sheet backsplash is one of the more accessible DIY tile projects. The key is thorough preparation, patience with layout planning, and not rushing the cure and drying steps.
What is the best adhesive for kitchen backsplash tile?
Mastic adhesive works well for most wall tile in dry to low-moisture areas. For areas directly behind the sink or stove with heavy moisture exposure, a polymer-modified thin-set mortar offers a stronger, more water-resistant bond.
How do I cut tiles to fit around outlets and corners?
A wet saw provides the cleanest, most precise cuts for porcelain and ceramic tile. A manual tile cutter works for straight cuts on softer ceramic. For curved cuts around outlet corners, a tile nipper or angle grinder with a diamond blade works best.
How soon can I use the kitchen after installing the backsplash?
Wait at least twenty-four hours after setting tile before grouting. After grouting, wait another twenty-four to forty-eight hours before exposing the surface to moisture. Full cure for grout sealer is typically seventy-two hours.
Does a kitchen backsplash increase home value?
Yes, an updated kitchen backsplash is consistently cited as a cost-effective improvement that enhances buyer appeal. While it may not have a dollar-for-dollar return, it contributes to the overall perceived quality and condition of the kitchen.
What grout should I use for a kitchen backsplash?
For grout joints under one-eighth of an inch, unsanded grout is appropriate. For wider joints, use sanded grout for added strength. Epoxy grout is the most stain-resistant option and works well in high-use kitchen areas, though it is harder to work with.
Is a home warranty worth it after a kitchen renovation?
A kitchen renovation is a significant investment, and the appliances and plumbing within that kitchen are still subject to mechanical failure over time. A home warranty provides repair and replacement coverage for those systems, offering financial protection that homeowners insurance does not cover.