What Does It Mean to Recaulk a Tile Shower — And Why Does It Matter?
If you have spent any time staring at the grout lines and sealed edges of your tile shower, you have probably noticed something: caulk does not last forever. Over time, the flexible sealant that runs along the corners, base, and edges of your shower walls starts to crack, peel, discolor, or pull away from the surface entirely. That is your shower telling you something important. Recaulking a tile shower is the process of removing that old, deteriorated sealant and replacing it with fresh caulk to restore a watertight seal. It sounds simple enough, and in many ways it is — but there is a lot more going on beneath the surface than most homeowners realize.
How Shower Caulk Works and Why It Breaks Down
Caulk is a flexible, waterproof sealant applied to the joints and transitions in your tile shower — primarily the corners where walls meet, where the wall meets the floor, and around fixtures like the faucet, spout, and showerhead base. Unlike grout, which is rigid and fills the gaps between tiles themselves, caulk is designed to flex with the natural movement of the structure. Your home shifts with temperature changes, humidity, and settling over time, and caulk accommodates that movement so water does not find its way into the substrate behind the tile. The problem is that constant exposure to heat, moisture, soap, and cleaning products slowly degrades caulk. Silicone and latex-based caulks are the two most common types used in showers. Silicone tends to last longer and resist mold better, but it is harder to apply cleanly and difficult to remove. Latex or acrylic caulk is easier to work with but may not hold up as long in a high-moisture environment. Either way, eventually both types will need to be replaced.
Warning Signs That Your Shower Caulk Needs Replacing
Catching caulk deterioration early can save you from a much bigger and more expensive problem down the road. Water intrusion behind tile walls is one of the leading causes of structural damage in bathrooms — and it almost always starts with a compromised seal. Here are the most common signs that it is time to recaulk your tile shower:
- Visible cracks, gaps, or separation along the caulk lines
- Mold or mildew that will not scrub away and appears embedded in the caulk itself
- Caulk that feels soft, spongy, or is peeling away from the tile or wall surface
- Discoloration that looks yellow, brown, or dark gray even after cleaning
- Water pooling at the base of the shower walls or seeping onto the bathroom floor
If you are seeing any of these, do not wait. The longer compromised caulk sits, the more opportunity moisture has to work its way into the wall cavity, the subfloor, or even the structural framing beneath your bathroom.
How the Recaulking Process Actually Works
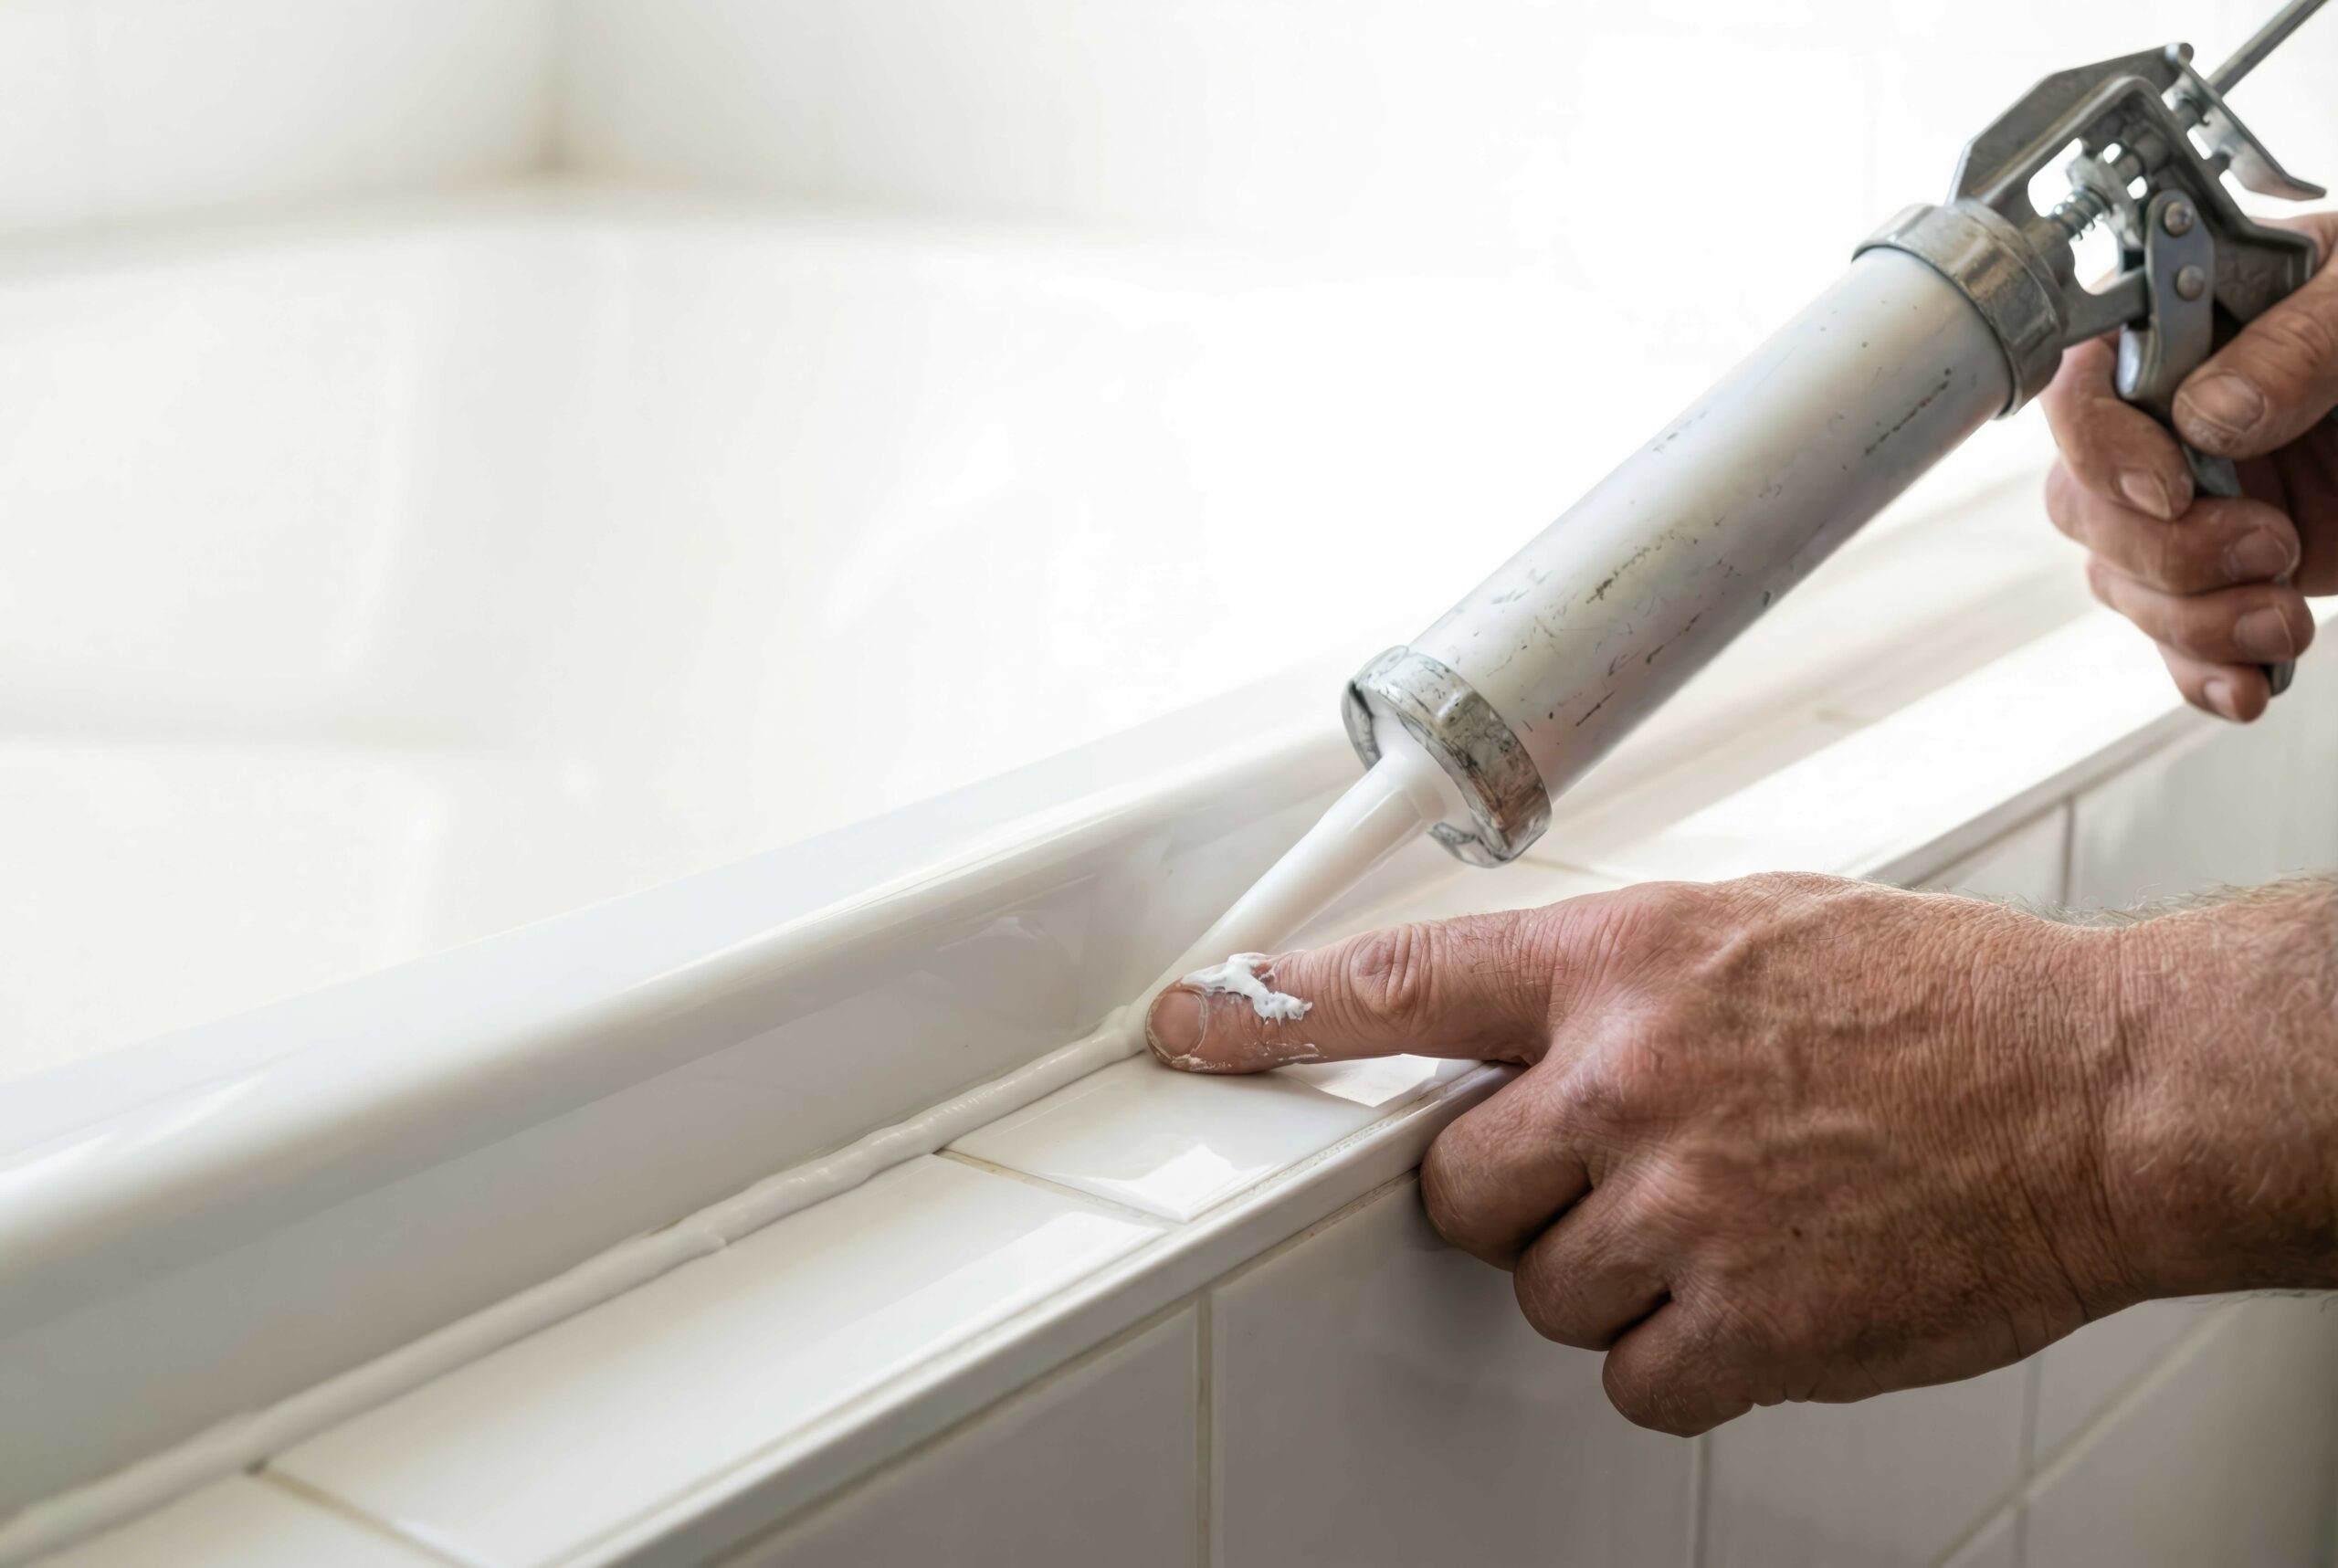
The process of recaulking a tile shower involves several steps that, when done correctly, produce a clean, lasting seal. First, all of the old caulk must be removed — and this is where most DIY projects start going sideways. Removing caulk thoroughly requires patience, the right tools (a caulk remover tool, a utility knife, and sometimes a chemical softener), and a steady hand to avoid scratching the tile surface. Once the old caulk is out, the joint must be completely cleaned and dried. Any residual soap scum, mineral deposits, or mold should be scrubbed away and the area treated with a mildew-fighting solution if needed. The surface must be bone dry before new caulk is applied — moisture trapped under fresh caulk is a recipe for premature failure. Applying the new caulk requires a steady bead along the joint, typically using a caulk gun, followed by a smooth tooling pass with a wet finger or caulk tool to press it into the joint and create a clean, concave finish. Then comes the hardest part for most people: waiting. Caulk needs anywhere from 24 to 48 hours to cure fully before the shower is used again.

Key Advantages of Recaulking Your Tile Shower
Recaulking is one of those home maintenance tasks that delivers an outsized return for a relatively small investment. Fresh caulk immediately improves the appearance of your shower, giving it a cleaner, newer look without a full renovation. More importantly, it restores the waterproof barrier that protects your walls, floor, and framing from moisture damage. Left unaddressed, water intrusion can lead to mold growth inside the wall cavity, rotted framing, damaged drywall or cement board, and eventually costly structural repairs. A full bathroom water damage restoration can run into the thousands — sometimes tens of thousands — of dollars. Recaulking as part of a regular maintenance schedule is a fraction of that cost and takes just a few hours of work. It also extends the overall lifespan of your tile installation, which is an asset you want to protect.
Common Drawbacks and Challenges to Be Aware Of
Recaulking a tile shower is not without its complications. The most common issue is incomplete removal of the old caulk. If even a small amount of old material is left behind, the new caulk will not bond properly and may fail much sooner than expected. Another frequent problem is applying caulk over a surface that is not fully dry — even a slightly damp joint can prevent proper adhesion and lead to bubbling or separation. Choosing the wrong type of caulk is also a common mistake. Not all caulks are formulated for high-moisture environments, and using an interior paintable caulk in a shower, for example, will result in rapid deterioration. Color matching can be another nuisance, especially in older showers where the existing grout or tile has faded. And for those without experience using a caulk gun, achieving a smooth, professional-looking bead takes practice.
DIY vs. Professional Recaulking: What Is the Right Call?
Recaulking a shower is a task that many homeowners can handle themselves with the right preparation and materials. If you are comfortable with basic home maintenance, have steady hands, and are willing to invest the time to do it properly, a DIY recaulk can be a satisfying and cost-effective project. That said, there are situations where calling in a professional makes more sense. If the old caulk has been failing for a long time and you suspect there may be water damage behind the tile, a professional should assess the situation before any new sealant is applied. Similarly, if your tile work involves natural stone or specialty materials, a professional with experience in those surfaces can help avoid costly mistakes. Professional recaulking services typically range from around one hundred to several hundred dollars depending on the size of the shower and the complexity of the job.
Maintenance Tips to Make Your New Caulk Last Longer
Once your shower is freshly caulked, a few simple habits can significantly extend the life of the new sealant. Keeping the shower well ventilated after each use reduces the moisture that accelerates caulk degradation. Running the exhaust fan during and for at least fifteen to twenty minutes after showering makes a real difference. Wiping down the caulk lines periodically with a mild, non-abrasive cleaner helps prevent soap and mineral buildup from breaking down the surface. Avoid using harsh bleach sprays directly on silicone caulk, as repeated exposure can accelerate breakdown. Also inspect the caulk lines visually every few months — catching early separation or cracking allows you to address it quickly before water has a chance to get behind the tile. Most well-applied shower caulk, with proper care, should last three to five years before needing replacement.
How Home Warranties Relate to Bathroom Water Damage and Plumbing Systems
Here is where things get interesting for homeowners thinking about the bigger picture. Recaulking itself is considered routine maintenance, which means it falls outside the scope of most home warranty coverage — and that makes sense. Warranties are designed to cover the unexpected failure of home systems and appliances, not scheduled upkeep. However, the consequences of neglected caulk, specifically water damage to plumbing components, subfloor systems, and structural elements, can absolutely intersect with warranty territory depending on your plan and provider. Understanding where routine maintenance ends and covered system failure begins is important for every homeowner. Staying on top of preventive tasks like recaulking protects not just your home but also the integrity of your warranty claims, since damage resulting from deferred maintenance is typically excluded from coverage.
Why Armadillo Is the Smart Home Warranty Partner for Proactive Homeowners
Homeowners who take the time to recaulk their tile shower, clean their filters, and stay ahead of small maintenance issues are exactly the kind of homeowners who benefit most from a well-structured home warranty plan. At Armadillo home warranty coverage for plumbing systems and home repairs, the focus is on making home protection straightforward, honest, and genuinely useful — not burying the important details in fine print. When a covered system fails unexpectedly, you want a plan that responds quickly and clearly, without the runaround. If you are ready to pair your proactive maintenance habits with a safety net that actually works, take a moment to get a free home warranty quote for bathroom plumbing and whole-home system protection and see what coverage looks like for your specific home. Protecting your investment starts with the small stuff — and Armadillo is built to handle the big stuff when it comes up.

Frequently Asked Questions About Recaulking a Tile Shower
Below are answers to the most common questions homeowners have about recaulking their tile showers, from timing and materials to cost and coverage.
How often should you recaulk a tile shower?
Most showers should be recaulked every three to five years under normal use, though high-use showers or those in humid climates may need attention sooner. Regular inspections help you catch deterioration before it becomes a water damage issue.
What is the best type of caulk to use in a tile shower?
100 percent silicone caulk is generally considered the best choice for tile showers because it is highly water resistant, flexible, and mold-resistant. It is harder to apply than latex caulk but holds up significantly better in wet environments over time.
Can you caulk over old caulk in a shower?
It is not recommended. Applying new caulk over old caulk typically results in poor adhesion and premature failure. The old material should be fully removed and the surface cleaned before any new caulk is applied.
How long does shower caulk take to dry before you can use the shower?
Most shower caulks require 24 to 48 hours to cure fully before the shower should be used. Check the manufacturer’s instructions on your specific product, as cure times can vary depending on the formula and ambient conditions.
Is recaulking a shower covered by a home warranty?
Recaulking is considered routine maintenance and is generally not covered by home warranties. However, water damage to covered plumbing systems caused by prolonged caulk failure may be subject to review depending on your warranty plan and provider.
What tools do I need to recaulk a tile shower myself?
You will need a caulk removal tool or utility knife, a chemical caulk softener for stubborn areas, a mildew-resistant cleaner, painter’s tape for clean edges, a caulk gun, and a wet finger or caulk smoothing tool to finish the bead properly.
How do I remove mold from shower caulk before recaulking?
After removing the old caulk, treat the joint area with a diluted bleach solution or a dedicated mildew remover, scrub thoroughly, rinse, and allow the surface to dry completely before applying new caulk. Do not apply caulk over any active mold growth.
Why does my shower caulk keep turning black?
Black discoloration in shower caulk is typically caused by mold growth within or beneath the sealant. This is usually a sign that the caulk has lost its integrity or that moisture is getting trapped underneath. Recaulking with a mold-resistant silicone caulk and improving bathroom ventilation can help prevent recurrence.
What happens if I do not recaulk my shower when needed?
Failing to replace deteriorated shower caulk allows water to penetrate behind the tile, which can lead to mold growth inside the wall cavity, rotted structural framing, damaged subfloor materials, and expensive water damage repairs that go far beyond the cost of a simple recaulk.
Can recaulking a tile shower increase home value?
While recaulking is not a major value-add on its own, it contributes to the overall condition and presentation of the bathroom. A clean, well-maintained shower signals to buyers that the home has been cared for, which can positively influence perceived value and inspection results.