
What Is a House Walk Through Inspection Checklist and Why Does It Matter?
A house walk through inspection checklist is exactly what it sounds like: a structured, room-by-room guide that helps homeowners, buyers, or sellers evaluate the condition of a property before a transaction closes or before moving in. It is not the same as a formal home inspection conducted by a licensed professional, though the two often complement each other well. The checklist version is something you can do yourself, with your own eyes and a bit of patience. Think of it as your first line of defense against surprises that show up after the keys are in your hand.
Who Should Use a Walk Through Inspection Checklist?
This kind of checklist is useful for more people than you might expect. Homebuyers approaching closing day will want to verify that the property is in the agreed-upon condition and that any previously negotiated repairs were actually completed. But sellers benefit from it too, since catching issues before listing can prevent last-minute negotiations that chip away at the final sale price. Even current homeowners who have lived in their home for years can use a walk through checklist as part of seasonal or annual home maintenance. If you are renting out a property, using a checklist at move-in and move-out protects both parties. The point is, the checklist is a tool. It works for whoever picks it up.
What to Inspect on the Outside of the Home First
The exterior of the home sets the tone for everything inside. Start from the outside and work your way in. Look at the roof from the ground if you can, checking for missing, curling, or discolored shingles. Gutters should be attached firmly and free of visible debris or sagging sections. The foundation perimeter deserves a slow, careful look for cracks, efflorescence, or signs of settling. Grading matters too: the ground should slope away from the foundation rather than toward it. Check the driveway, sidewalks, and any exterior steps for cracking or heaving. Siding, stucco, or brick should be intact without gaps, rot, or areas where moisture could enter. The garage door, if present, should open and close smoothly and reverse when it meets an obstruction. These exterior details are easy to overlook when you are excited about a home, but they are often the most expensive items to fix.
Room by Room: What to Look for Inside the Home
Once you step inside, the checklist becomes more granular. A solid house walk through inspection checklist breaks the interior into individual rooms and functional systems so nothing slips through the cracks.
- Kitchen: Test all appliances, check under the sink for moisture or soft cabinet floors, run the garbage disposal, and inspect the dishwasher for signs of leaks around the door seal.
- Bathrooms: Flush every toilet, run every faucet, and check around tubs and showers for grout gaps or caulk that has separated from the wall. Look under vanity cabinets for any discoloration that hints at past or current leaks.
- Bedrooms and Living Areas: Open and close every window and door. Look at ceilings for water stains or texture inconsistencies. Check outlets with a phone charger or small tester. Note any cracks in walls or floors that seem wider than a hairline.
- Attic and Basement: Look for daylight coming through where it should not, signs of moisture, insulation gaps, or pest activity. These spaces often reveal what the rest of the house is hiding.
Plumbing, Electrical, and HVAC: The Systems That Run Everything
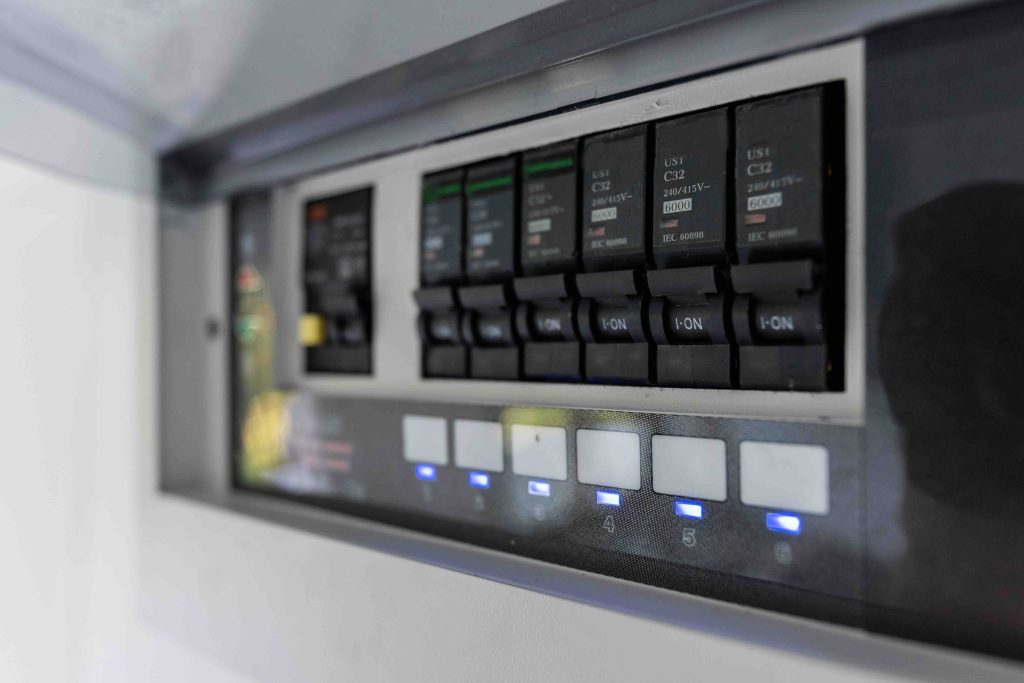
Major home systems deserve their own focused section of your checklist. For plumbing, turn on multiple faucets simultaneously to test water pressure. Look at water heater age and condition, check for rust around valves, and note any slow drains. For electrical, verify that the panel is labeled clearly, that no breakers appear scorched or smell burnt, and that GFCI outlets in wet areas are functioning. The HVAC system should run without strange sounds or smells. Replace the filter if you have not recently, and check that air flows evenly from vents in every room. These systems are where deferred maintenance tends to hide, and they are also where the most significant repair costs tend to originate.

The Advantages of Using a Walk Through Checklist
Using a structured checklist rather than a casual stroll through a home has real, measurable advantages. First, it creates documentation. When something is written down, dated, and noted with a photo if possible, it becomes evidence. That matters during negotiations, during warranty claims, and during disputes with contractors. Second, the checklist keeps you from getting distracted by cosmetic features like fresh paint or new countertops that might overshadow a soft spot in the subfloor nearby. Third, it gives you a baseline. When you revisit your home six months later and something has changed, you have a record of what it looked like before. That historical record is genuinely useful, more than most homeowners realize until they need it.
Common Mistakes Homeowners Make During a Walk Through
The biggest mistake is rushing. Walk throughs that happen under time pressure tend to miss things. If you are doing a final buyer walk through before closing, do not let anyone hurry you. The second most common mistake is ignoring the small stuff. A single soft spot on a bathroom floor, one stain on a bedroom ceiling, or a door that sticks in its frame are not random inconveniences. They are signals. Treat them as such. Another frequent misstep is skipping the attic, basement, or crawl space because they are inconvenient to access. Those are often the areas where the most revealing information lives. Finally, some people forget to bring anything to document what they find. Walk in with your phone charged, the checklist in hand or on screen, and the mindset that you are gathering information, not just previewing a space.
How a Walk Through Checklist Connects to Home Warranty Coverage
A home warranty is a service contract that covers repair or replacement of major home systems and appliances when they break down from normal wear and tear. The connection to a walk through inspection checklist is practical and direct. When you document the condition of your HVAC, water heater, plumbing, and electrical systems during a walk through, you create a clear picture of their state at a specific point in time. This matters because home warranty providers typically require that covered systems were in working condition at the time the policy began. If your checklist shows that the furnace was running and the water heater had no visible corrosion on move-in day, you have supporting context if something fails later. A checklist does not replace a warranty, and a warranty does not replace a checklist. But together, they form a smarter approach to protecting your home investment.
Practical Tips for Making Your Checklist More Effective
A few adjustments can significantly improve how useful your house walk through inspection checklist turns out to be. Use a printed or digital template rather than a blank notes page so you do not accidentally skip a category. Walk through during daylight hours when possible so natural light reveals things artificial lighting might flatten. Bring a flashlight anyway for closets, under sinks, and mechanical areas. Take photos of anything that looks off, even if you are not sure whether it matters. Number each concern so you can reference it in a conversation with a contractor or agent without confusion. If you are a buyer doing a final walk through, compare your checklist findings directly to the inspection report from earlier in the process to verify what was repaired and what was not.
Why Armadillo Is the Right Partner After Your Walk Through Is Done
Once you have completed your house walk through inspection checklist and you have a clear picture of your home’s condition, the next logical step is protecting yourself against what comes next. No matter how thorough your inspection was, home systems and appliances break down over time. That is not a scare tactic; it is just physics. Armadillo exists to make that reality less stressful and less expensive. As a modern home warranty provider built for homeowners who take their home maintenance seriously, Armadillo offers straightforward coverage with transparent terms and no surprise exclusions buried in fine print. The process is refreshingly simple. After your walk through confirms your systems are in working order, you can get a personalized home warranty quote tailored to your home’s systems and appliances in just a few minutes. Armadillo does not overcomplicate things, and it does not leave you guessing about what is covered. If your inspection revealed working systems that now need protection from future wear and tear, Armadillo is the logical next step.

Frequently Asked Questions About the House Walk Through Inspection Checklist
Real questions from real homeowners, answered clearly so you can move forward with confidence.
What is the difference between a walk through inspection and a professional home inspection?
A professional home inspection is conducted by a licensed inspector who uses specialized tools and produces a formal written report. A walk through inspection checklist is a self-guided evaluation that any homeowner or buyer can complete without hiring anyone. Both are valuable, but they serve different purposes and carry different levels of authority.
When should a buyer do a final walk through before closing?
The final walk through typically happens within 24 to 48 hours before the closing date. This timing allows buyers to confirm that any agreed repairs have been completed and that the property is in the same condition as when the purchase agreement was signed.
How long does a house walk through inspection take?
For an average-sized home, a thorough walk through using a detailed checklist takes between one and two hours. Larger homes, older properties, or those with complex systems may take longer. Rushing through it defeats the purpose.
Can a seller use a walk through checklist too?
Absolutely. Sellers who complete a walk through before listing are better positioned to identify and address issues before buyers discover them. This reduces the chance of price reductions or deal collapses late in the transaction process.
What should I bring to a walk through inspection?
Bring a printed or digital checklist, a fully charged phone for photos and video, a flashlight, a phone charger or outlet tester, and a notepad. Comfortable shoes matter more than people expect since you may be climbing into attic spaces or crawling near a water heater.
Does a walk through checklist need to cover every single room?
Yes, ideally it should. Skipping rooms or spaces because they seem less important is one of the most common ways buyers and homeowners miss significant issues. Even a half bath or small utility closet can reveal moisture problems or outdated plumbing connections.
What happens if problems are found during the final walk through?
If new or unresolved issues are discovered during the final walk through before closing, buyers can request that the seller address them before closing occurs, negotiate a credit, or in serious cases, delay or cancel the transaction. Having the issues documented on a checklist strengthens this position significantly.
How does a walk through checklist relate to a home warranty claim?
A walk through checklist creates a documented record of the condition of home systems and appliances at a point in time. If a system later fails and you file a home warranty claim, having dated notes or photos showing that the system was operational when coverage began can support your case.
Are there free house walk through inspection checklists available?
Yes, many real estate associations, home inspection companies, and home warranty providers offer free downloadable or printable checklists. The key is selecting one that is comprehensive enough to cover both the structure and the major systems rather than just a surface-level overview.
Should I use a walk through checklist even if I already have a professional inspection report?
Yes. A professional inspection report reflects conditions at a specific moment, often weeks before closing. The final walk through checklist lets you verify that nothing changed in the interim and that all repair items were actually completed before money and keys exchange hands.